Faculty Resources
| Site: | Online Learning & Educational Technology (OLET) |
| Course: | Online Learning & Educational Technology (OLET) |
| Book: | Faculty Resources |
| Printed by: | |
| Date: | Friday, June 26, 2026, 11:47 AM |
Moodle v4.5 News
 ENABLED JUNE 18, 2025
What's New?
- Upgrade to Moodle v4.5
- Applied the 2025 Course Structure Template
- NEW! Self-enroll in the Moodle 4.5 Upgrade course for more exploration
What Will Change?
OVERVIEW: The Moodle update from v4.1 to v4.5 continues Moodle's focus on the user experience—improving efficiency and usability for both faculty and students. Although there are dozens of enhancements, we've focused on some of the substantive additions. See more details below:
- Quickly create content or add subsections: There's no need to scroll down to the bottom of a section to add an activity, resource, or subsection. Simply click the plus sign between elements anywhere on the course main page. Subsections can help organize your course structure by grouping materials together.
- Settings access: Directly access activity and resource settings, such as visibility and availability, completion conditions, and groups (if enabled) on the course main page and via the drop-down menu under the 3 vertical dots.
- Indent items: Indent activities or resources on the course main page—one place to the right or left—from the Edit settings menu for the item. The indentation will also appear in the Course Index.
- Bulk editing: Enable bulk actions from the upper right-hand corner of the course main page to action bulk duplicate, delete, move, and change availability. You can close bulk editing from the footer. NOTE: Although the Mass Actions block will still be available, we've removed it from the Course Structure Template in favor of this built-in tool.
- Course navigation: In addition to the Course Index drawer you may see the Nav Bar (sometimes referred to as Breadcrumbs) located at the top of pages inside a course. Both indicate where you are in the course. NEW! Click on the course name to return to the course homepage where you can see all course content. Otherwise, you are only accessing the individual section.
- Default text editor: The TinyMCE editor—designed with accessibility and usability in mind—has replaced the original ATTO text editor, which uses outdated technology and is no longer supported.
- HTML </> is under the View drop-down menu: <> Source Code
- ! breaks the Moodle autolink
- Reveal or hide additional toolbar items with ...
- NEW! Default accepted file types: The Assignment activity accepted file types will represent those commonly used at our institution (.doc, .docx, .rtf, .xls, .xlsx, .ppt, .pptx, .html, .odt, .ods, .txt, .png, .jpg, .gif, .pdf). NOTE: To restrict or expand the accepted file types, you can still enter or remove the individual file extensions.
- Gradebook navigation: The Grader report has integrated an extensive menu system. For example, click the 3 dots (...) next to your student's name to quickly switch to Single view or User report. NOTE: Access Single view, from either the Grader report or the Gradebook dropdown menu, to quickly enter student scores.
- Quiz attempts: Easily reopen quiz attempts that were never submitted with a single click.
- Quiz question type: The ordering question type allows students to rearrange words or phrases, or reorder images.
NOTE: OLET has not implemented any Moodle-integrated AI tools to date.
What Remains the Same?
- The Moodle Dashboard:
- Academic Support & Essentials: From Microsoft Office 365 FREE software to online Tutoring Services, these links directly access many of the resources students need to succeed at CCC.
- Timeline: This block can display due dates that have been assigned. Students can choose whether to view those activities over the next week, month, or further into the future. This block also states the activity completion requirement and takes anyone directly to that activity in the course.
- Recently accessed courses: The block shows the courses that were last visited, allowing anyone to quickly jump back in.
- Calendar: Course assignments, quizzes, etc. may be configured to automatically populate this block. However, anyone can also create their own reminders too. Simply click on the month (e.g. June), then on the New event button in the right-hand corner of the month view.
- Moodle My courses:
- My courses: All of your courses can be found under this link—to the right of the Dashboard link—at the top of every Moodle page. (Remember, you can still filter the Course Overview to show those courses In progress, Future, Past, Starred, and Removed from View.)
- Moodle 2025 Course Structure Template:
(Self-enroll in the 2025 Course Structure Template GUIDE Moodle course for more details.) - Course Essentials is designed to support students with a consistent user experience and the essentials needed to succeed:
- Welcome and Getting Started
- Equity Statement
- Ask & Share Forum is an Announcement Forum where students can post. NOTE: Confirm your permissions are set properly.
- Course Syllabus is an accessible Moodle Book.
https://docs.moodle.org/405/en/Book_resource
- Module Overview prepares students for learning with Module Learning Outcomes that are clearly defined, measurable, and aligned to learning activities and assessments.
- Contact Information encourages and supports student-instructor interaction.
NOTE: OLET has removed the Mass Actions Block from the Course Structure Template in favor of the built-in Moodle feature: Enable bulk actions.
—Frequently Asked Questions
- Will I lose my course content when I import my existing course into Moodle 4.5?
- NO. Moodle 4.5 will import everything from your original course.
- Will the new template impact my course layout?
- NO.
 Your
course format (weekly or topic) and content will appear in the same order as in your original course. However, the General section will now be called Course Essentials which includes a sample syllabus Moodle Book and other recommended
items. Any integrated 2025 Course Structure Template items, such as a learning outcomes label, are hidden from students by default.
Your
course format (weekly or topic) and content will appear in the same order as in your original course. However, the General section will now be called Course Essentials which includes a sample syllabus Moodle Book and other recommended
items. Any integrated 2025 Course Structure Template items, such as a learning outcomes label, are hidden from students by default.
NOTE: The 2025 Course Structure Template will only be applied to empty Moodle shells.
- NO.
- Will I need to update my course content?
- MAYBE. You may need to update any student resource that addresses course navigation since Moodle 4.5 has simplified the user experience. You'll also want to review the Start of Term Procedures since they have been updated as well.
—What Can You Do?
- Watch the Moodle 4.5 Teaching Basics video tutorials:
- Attend an OLET-facilitated session every Thursday, 1-3 pm:
- Experience Moodle 4.5 as a teacher or student with Moodle's Mount Orange School Demo course:
- WATCH for OLET sessions during 2025 Inservice Ramp-Up Week, September 15-19.
- Explore the 2025 Course Structure Template GUIDE which explains the Open SUNY Course Quality Review (OSCQR) standards and Moodle 4.5 features.
2026 OLC and UPCEA Memberships
The Online Learning & Educational Technology (OLET) department has again partnered with the OLC (Online Learning Consortium) and now UPCEA (University Professional and Continuing Education Association) to provide all CCC faculty with an opportunity to improve their professional practice.
The Online Learning Consortium (OLC) is a collaborative community of higher education leaders and innovators dedicated to advancing quality digital teaching and learning experiences designed to reach and engage the modern learner. OLC provides an extensive set of resources, including best-practice publications, quality benchmarking, leading-edge instruction, community-driven conferences, practitioner-based and empirical research, and expert guidance.
![]()
Explore the resources available on the Online Learning Consortium website to learn more. Then, sign up for OLC Today for weekly updates on new industry trends, research, professional development opportunities, and more.
Upcoming Webinars
- AI Meets Accessibility: Transforming the Online Lab Experience - May 12
- Innovative Approaches to Accessibility: Tools, Techniques, and What's Next - May 27
- When AI Joins the Course Design Team: An ID's Journey Through Faculty AI Adoption - July 8
- Wellness That Works: Evidence-Based Practices to Support Online Learners - July 21
- Designing Workforce-Ready Pathways: A 4T Sprint for Digital Learning Leadership - August 19
UPCEA serves its members and advances leadership in online and professional continuing education with innovative conferences and specialty seminars, research and benchmarking information, professional networking opportunities and timely publications. Explore the resources available on the UPCEA website and those featured below:
 Online Education Leadership
- UPCEA Hallmarks of Excellence
- Benchmarking Research & Consulting
- Career Center
- Publications
- UPCEA Blogs
- Books
- Intentional Teaching podcast
If you register for any of these learning opportunities, be sure to take advantage of our UPCEA institutional discount.
Moodle Quick Links
Keep in mind that you can find these and many other resources via the red bar at the top of every Moodle page under Faculty.
Getting Started
- Find Your Moodle Course(s)
- Start of Term Checklist
- Request a Faculty Workspace
- Install Moodle on a Mobile Device
- Moodle Video Resources

Ending Well
- End of the Term Checklist
- Zoom Cloud-Recording Retention Plan
- Moodle Retention Plan & Course Requests
Course Activities
OLET Resources
- OLET Knowledge Base
- 2025 Course Structure Template GUIDE
- H5P Repository Course
- Kaltura MediaSpace
- Moodle Quizzes
- Zoom Video Conferencing
- OLET Course Development Matrix
- Center for Teaching and Learning (CTL) Course Building Worksheet
Accessibility Resources
- WCAG 2.1AA Accessibility Hub
- Make Your Course Accessible
- YuJa Panorama Website (outside Moodle)
- YuJa Panorama (inside Moodle)
- Create Accessible PDFs w/Microsoft Word
- Closed Captioning
- Strip Formatting w/HTMLg
- FREE Accessibility Basics Course
- Accessibility Statements
Common Tasks
—Recommended Term Timline
| Activity | Details | |
| Pre-Term Start | 1 - Get help with Moodle and/or Zoom |
Visit the red bar on any Moodle page under Faculty > *Remote/Online Instruction FAQ* to access resources, upcoming Moodle and Zoom training, and/or email online@clackamas.edu for assistance.
|
| 2 - Create your remote teaching plan |
You'll want to assemble your course assets: syllabus, learning outcomes, assessments, required textbooks, resource materials, etc. before you begin working in Moodle. Take some time to consider how you want your course structured—with a weekly or module/topics format.
|
|
| 3 - Update your syllabus |
Include your communication and new course details as necessary. Be sure to include a link to CCC Resources and Information for Students During the COVID-19 Pandemic and CCC Support and Emergency Funding Resources too. When you're ready, upload it to Moodle or add it to your welcome email. |
|
| 4 - Identity essential material to distribute |
Check your remote teaching plan - what are the essential components for week one? What are your goals for this week, and do any of those goals rely on materials that need to be converted to a digital format?
|
|
| 5 - Send first welcome message |
Send your welcome message to students to inform them how you will communicate throughout the term, through what medium, and how often. |
|
| 6 - Distribute student remote readiness survey |
In your welcome message, consider including this short survey to students. While this will not ultimately be the determinate of how you teach, having a better idea of your students' technology capabilities can inform important decisions you need to make. Are you ready for online learning? For example, if less than half of the class has reliable home internet, requiring synchronous sessions on Zoom might not be successful and an asynchronous option should be considered. |
|
| 7 - Review week one |
By now you have completed a review of your course content for the first week or two of class, considered how you will deliver your essential content, and communicated critical information to your students. (Take a deep breath.) Before the class automatically opens on the first day of the term, consider the information you have gathered. Is there anything glaringly missing? Are there stakeholders (your chair, admin, online learning staff) who you need to contact for any information? Remember that you can hide course elements from student view until you are ready to release them. |
|
| First Week | 1 - Post welcome and syllabus |
Welcome your students through your established communication method (as you outline in your course syllabus). Introduce yourself and the class. |
| 2 - Take attendance |
You'll need to use an asynchronous attendance activity to record attendance such as:
|
|
| 3 - Manage late enrollments |
As usual, there is likely to be much shuffling of students during the first week of the term. If a student approaches you requesting a late add to your course, you will need to contact Registration. If you have students who are struggling with technology and access, you can refer them to the Cougar Connect Information Desk. |
|
| 4 - Get started teaching! |
Hopefully, by day two or three of the term you can start diving into the real curriculum of the course. Remember that there are best practices, pedagogical recommendations, and more technology resources available via the red bar on any Moodle page under Faculty. |
|
| Ongoing | 1 - Host office hours |
Host virtual office hours. This means being available for student questions and consultation during a specific, predetermined period of time. You can host virtual office hours through Zoom video conferencing, or simply be readily available through email or phone...whatever works for you and your class. |
| 2 - Deliver content |
Keep calm and carry on: deliver your lectures, assess student comprehension, provide grade information and feedback, and engage with your class to the best of your ability. |
|
| 3 - Get help with Moodle and/or Zoom |
Visit the red bar on any Moodle page under Faculty > *Remote/Online Instruction FAQ* to access resources, see upcoming Moodle and Zoom training, and/or email online@clackamas.edu for assistance. |
—Working with Question Banks
Import Questions
- Download and (if needed) unzip the question bank(s) from the publisher's site
- Log in to Moodle and enter the designated course
- Locate the Actions menu (gear icon) from the top-right corner and select the More option
- Scroll down to the Question bank section, then click the Import link
- Select the appropriate File format (most commonly Aiken, Blackboard, or Examview)
- If you have Gradebook Categories already established:
a. Expand the General section
b. Select the Import category destination (i.e. generally the current course)
NOTE: If you do not have Gradebook Categories already established, see Reusable Question Pools: Categories next.
- Drag and drop each question bank file into the box under the Import questions from file section one file at a time.
- Click the Import button and wait NOTE:Two green notices signify success. If you see a red alert or an error message or a blank line instead of imported question text, contact ISPD for help.
- Preview your results, then click Continue to review the individual questions (see Edit an Existing Quiz Question)
Edit an Existing Quiz Question
- Login to Moodle
- Locate the question in the quiz or question bank in the designated course
- Click the Edit icon (represented by a gear symbol)
- Make any desired changes, then Preview the changes
- Close the Preview window and click Save changes
Reusable Question Pool: Categories
- Log in to Moodle and enter the designated course
- Locate the Actions menu (gear icon) from the top-right corner and select the More option
- Scroll down to the Question bank section, then click the Categories link
- Scroll to the bottom of the page to the Add category form:
a. Parent category: use Default for (course name)
b. Name: use textbook title with edition/year and (subsequently) textbook topics/chapters
c. Category info: N/A - Repeat to add new categories
Convert MC Questions from Document/PDF
- Open a plain text editor (e.g. Windows Notepad or Apple TextEdit)
- Copy and paste your questions from the document/PDF into the text editor
- Reformat as needed to comply with the instructions below:
 Each question must be on its own line without any numbering
 - All options must:
- begin with a capital letter: A, B, C, etc.
- follow each capital letter with a period and a single space
- be continuous text, i.e. without a forced line break
- ANSWER must be in all caps, followed by a colon, a single space, (see example below) and a capitalized correct answer letter.
- Separate each question with a single line break.
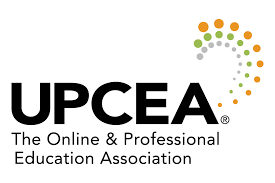
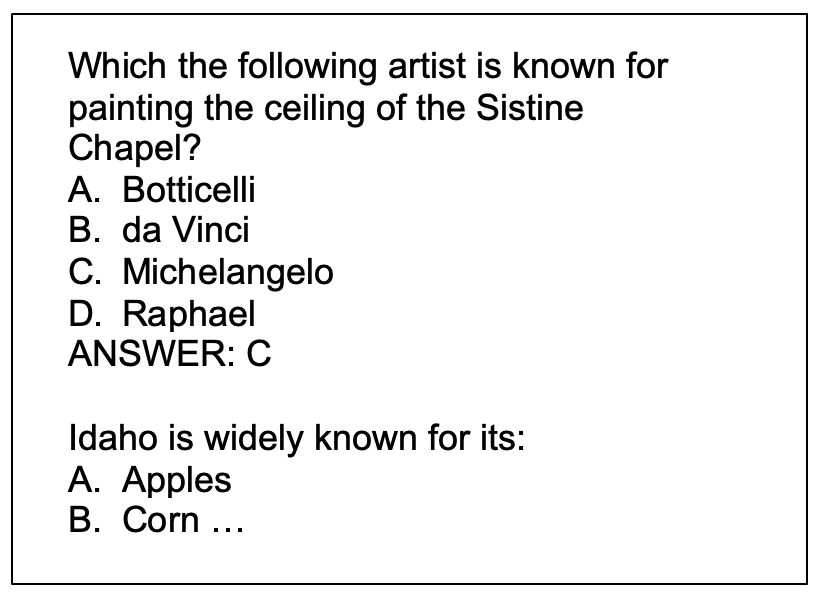 Each multiple-choice (MC) question is
composed of a stem followed by four
options—one correct option and four
distracters.
Each multiple-choice (MC) question is
composed of a stem followed by four
options—one correct option and four
distracters.Special characters (such as é, ñ, “”) may cause the question bank import to fail or the question text to display incorrectly. So… either remove the special characters prior to the import or replace them once the questions appear in Moodle.
- Click the File > Save or Save As option (.txt) in the text editor
- Locate the Plain Text Encoding drop-down menu and select Unicode (UTF-8)
- Click the Save button (see Import Questions for next steps)
Tips for Writing Good Multiple-Choice Questions
These tips are adapted from the Item Developers Guide published by the Professional Testing Corporation.- A good question stem:
- focuses on important learning objectives and avoids testing trivia.
- presents a problem situation clearly.
- is stated positively rather than negatively.
- avoids the use of the pronouns it, he, she, and you.

- is presented as simply as possible, including only information that is necessary to understand the problem.
- includes all words that have to be repeated in each option.
- specifies the authority or standard upon which the correct option is based if the question calls for a judgment (e.g. According to the American Medical Association).
- poses a problem to which the correct answer is not likely to change over time.
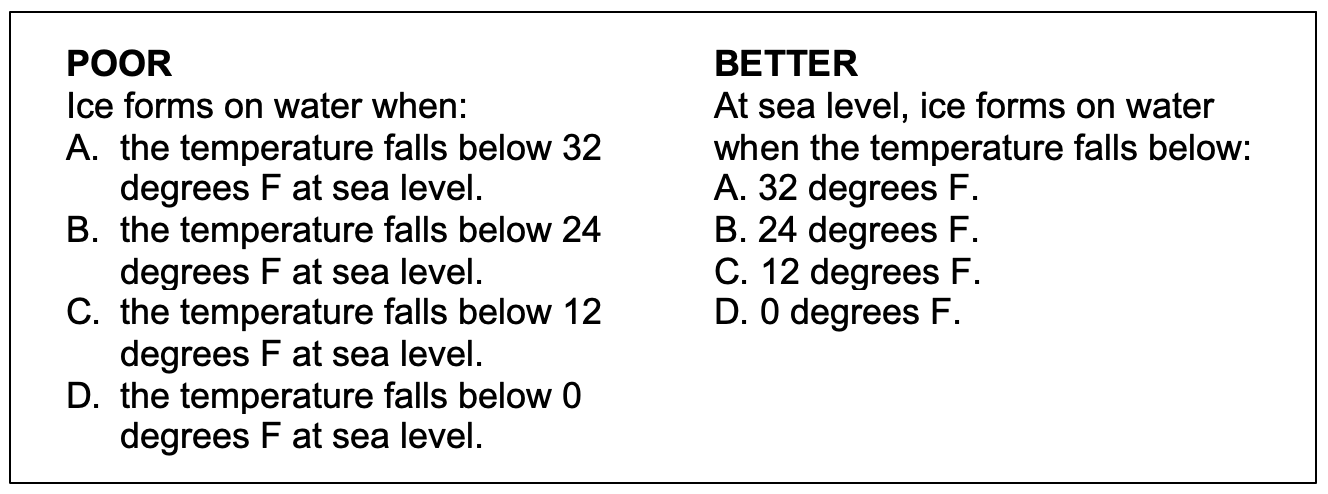
- Correct options are unquestionably correct! Distractors are unquestionably wrong!
- All options are grammatically related to the stem. If the stem asks a question, each of the
four options provides a plausible answer to the question. If the stem is an incomplete
statement, each option serves to complete the statement.
- All options are homogeneous in terms of structure and content.
• The correct option is similar in length to the distracters.
- Absolute terms are avoided (e.g. all, none, always, never, generally, often, likely).
- Options are mutually exclusive.
- The correct option includes no incorrect information.
- Avoid None of the above and All of the above.
—Moodle Retention Plan and Course Requests
To reduce the number of courses stored in Moodle and improve its overall performance, OLET regularly removes provisioned courses 2 years and older. Non-provisioned courses (i.e., specialty, development, and staging area) will remain in Moodle. Namely,

- Course data will be stored within Moodle for 2 years for easy access by faculty and staff.
- Course data is archived externally for 10 years to allow access to gradebook and instructor/student communications.
- User accounts will remain active in Moodle for 10 years from the last login.
OLET will audit Moodle data and remove provisioned courses and user accounts as needed.
Why is this important?
- Improves site performance: Users can experience significant site slowness due to instructors and administrators enrolled in an unmanageable number of courses.
- Reduces user account issues: students can experience access issues due to inaccurate and duplicate user accounts.
- Clean, accurate data: reliable and precise data is essential for reporting and other assessment and research processes at the college.
What can you do?
- Backup your course content at the end of each term: OLET provides step-by-step instructions on how to backup a course and export a gradebook so you'll have easy access to your content after your courses have been archived. You can then restore those backups into your staging area or future courses as needed.
- Request an archived course: Course archives are created automatically 1 week after each term has ended. However, you can request that any archived course be restored to your staging area by submitting an OLET support ticket. Be sure to provide the year, term, course name (e.g. WR-227), and section number. NOTE: If you are not listed as the instructor for the course, you will need to provide us with permission (via email) from the instructor or department chair to have the course restored.
Contact Moodle Support
Prioritized service: Submit a ticket to Online Learning/Moodle Support for...
- Accessibility
- Moodle
- Technology-Enhanced Classroom
- Training/Workshops
- Zoom/Kaltura
 Join us online every Thursday 1-3 pm for a drop-in session. Currently, we'll focus on course accessibility, but all questions are welcome.
Can't make one of our LIVE sessions? Request a custom or specialized group training/workshop through our Online Learning/Moodle Support ticketing system.
Schedule a Zoom appointment:
- DW Wood - Online Instruction/Educational Technology Support
- Hillary Abbott - Moodle Technical Support
- Katrina Boone - Associate Dean
Phone: 503-594-6618
Email: online@clackamas.edu
Oregon City Campus: Streeter Hall S143 Monday-Thursday
Still need help? Contact our extended support team for after hours, weekend and/or bilingual support (English/Español). We can also send you resource materials and/or design a session for your department or program.
Online Teaching Best Practices
Online courses must be equivalent to in-person courses in content and quality—but what does that mean? It’s more than just using the same class plans in an online format. Aligned with CCC ISP (Instructional Standards & Procedures) 150: Online, Hybrid, and Remote Courses, this resource explores how you can create and run an online course with student engagement, regular and substantive interaction (RSI), and reflection in mind.
Course Design
Crucial elements of a well-designed online course leading to high-quality education and student success include:
- Deliberate focus on the learning outcomes, especially while choosing readings and materials and designing assignments. Active learning and student engagement are key to student success. Consider the sequence of readings, materials, and assignments in order to scaffold learning toward the attainment of the outcomes. Additionally, visually reflect this sequence in your course (e.g., Label, Book, Completion Tracking).
- Awareness of both accessibility and copyright law, making sure that all readings are legally available for students and that proper means of access are provided for diverse learners (e.g., closed caption videos, webpages that will work well with screen readers, and so on). Consider a variety of modes and instructional materials to align with the nontraditional delivery method.
- A prominent and easily navigable syllabus. This must meet all requirements listed in CCC ISP
160A: Course Syllabus Information and Format, including the following:
- Schedule of readings, assignments, and tests with accurate and current dates;
- Clear parameters and expectations for grade calculation;
- Office hours for the instructor, as well as contact information (email and office phone);
- List of readings, texts, or course materials;
- Learning outcomes for the course;
- Available resources such as the Disability Resource Center and the Learning Center;
- Other important policies such as academic honesty and late work.
- An online gradebook so that students have access to their progress.
Midterm Redesign Techniques and Strategies
- Engage in flipped learning where students can review online lectures (recorded via Zoom or Kaltura) in advance of the limited in-class time.
- Convert recognize and recall knowledge assessments to individual study or review with Moodle Quiz settings, Kaltura Quiz knowledge checks, and/or specific H5P content types.
- Communicate an explicit set of criteria focused on student learning outcomes and expedite grading speed with Moodle Rubrics.
- Assign Moodle Groups to improve collaboration, community building, and reduce grading time.
- Engage students in the Year/Term realignment process (even anonymously) through the Moodle Feedback, Questionnaire, or Choice activities.
Course Start
To set students up for success in the potentially difficult beginning of an online class, instructors should:
- Check all links and video/audio clips to make sure they are current and functioning properly before making the course visible to students.
- Open the course by (at the latest) the start of the first day of the course. The course syllabus information, especially the means for contacting the instructor, should be visible on that first day.
- Notify students that class has started (for example, via email, through a News Update on Moodle, or through other means), with particular attention to their expectations for interaction, as well as to the fact that they have access to technical and academic support should they need it.
- Provide an introduction to the course, including its overall objectives, its general operating structure, and a clear path for getting started. This can be on the course homepage itself, though it can also be provided in an email. An introduction to the instructor is also recommended.
- Make the syllabus both prominent and online-friendly. Students should be guided through reading the syllabus and showing they understand the requirements (as a face-to-face class might take the first class session to discuss the syllabus).
- Provide an introduction activity for students. Online learning can be isolating, but it is both possible and desirable to build a community for learners to relate to and interact with one another.
- Communicate actively with students as they begin the course. This includes frequent check-ins with the class website, but also vigilant email communication in the opening days. See also the next point, “Communicating.”
Course Communication
To maximize student engagement through effective online communication, instructors should:
- Make your presence a visible and integral part of the class, participating in discussions and responding directly to student questions.
- Respond to emails and discussion board questions in a timely matter, ideally within 2 business days.
- Make every effort to provide grades and feedback on assignments within one week of receiving completed work so that students are able to apply and build on course concepts and skills.
- Promote a sense of community within the class, encouraging students to respond to each other to deepen understanding and engagement.
- Consider online office hours as well as in-person ones.
Course Management
How an instructor manages an online class requires as much mindful attention and effort as any face-to-face class. It is important to consider both how course materials are delivered and how student progress is monitored. To manage online courses effectively, instructors should consider the following:- Contact inactive students, in a timely manner, ideally no later than the end of the first week.
- Pay particular attention to student progress early in the course. Communicate directly with students when they fall behind or seem to be underperforming.
- Make weekly announcements, reminders, or posts of new material to help keep students engaged.
- Facilitate discussion with strong instructor presence, including meaningful responses and commentary.
- Intervene to re-direct inappropriate behavior or unsatisfactory comments.
- Refer students to the appropriate learning services and resources as needed.
- Design learning opportunities to promote interaction and active learning.
- Provide timely and personalized feedback early enough for students to adjust their performance.
- Perform frequent assessments of student learning, and be willing to make changes based on such assessments.
- Provide access to current grade status and keep the gradebook current.
- Fix broken links, typos, and mistakes or otherwise update the course content as appropriate.
- Provide opportunities for students to ask questions about or give feedback on the course and be willing to adapt as necessary.
—Creating Community Online
Preferred Name
Communicate with your students about which name they prefer to use. If names are inaccurate, they can be updated as follows:
- Contact Registration on the Oregon City Campus (in Roger Rook) to change the Display name across the institution
NOTE: All Display, Username, and Email can be changed between terms via Registration.
Moodle Profile Image
Upload a picture to your Moodle Profile so your students can easily identify you. Then, ask your students to do the same.
- Login to Moodle
- Click the down arrow (top-right) to open the User Menu
- Select Profile
- Click Edit profile under User details
- Scroll to User picture and upload an image
- Scroll to click Update profile to save changes
Welcome Students
Welcome each student to your Moodle course by name.
- Login to the designated course in Moodle and Turn editing on
- Choose the desired content item, then click on the Edit menu > Edit settings option
- Type and/or [lastname] (in lowercase as shown) within the course content, heading, or forum post to automatically reference each student by name
- Click the Save changes button at the bottom of the page
Introductions
Create a Forum (public) or Assignment (private) Activity within Moodle asking students to introduce themselves; and/or…
Introduce yourself to your students with a welcoming video using Zoom Video Conferencing.
- Login to Moodle via online.clackamas.edu
- Within the red bar at the top of Moodle open the Faculty menu
- Select Zoom Video Conferencing
- Select Recording Content (PDF)
- Follow the instructions provided:
- Activate your account
- Record a video
- Upload a video to YouTube
- Embed a YouTube video in Moodle
Learn Faces and Names
Learn faces and names as you use Zoom Video Conferencing.
- Login to Moodle via online.clackamas.edu
- Within the red bar at the top of Moodle open the Faculty menu
- Select Zoom Video Conferencing
- Select Best Practices (PDF)
- Follow the instructions provided under Best Practices > Session Recording
- Select and check Video Recordings > Meeting > Always display participants’ names on their videos
Reflect Your Community Through Images
Explore these repositories of free or openly licensed photos and images featuring people of color, trans, non-binary, indigenous, and other diverse population groups to reflect your community. While attribution is not required to use some photos, please consider giving credit whenever possible so that others may find these collections.
- Images of Empowerment: Free images of women’s lives and work, created by the William and Flora Hewlett Foundation, the David and Lucile Packard Foundation, and Getty Images
- Allgo Plus-Size: Free stock photography collections featuring plus-size people
- Disabled And Here: Free stock photography featuring disabled BIPOC (Black, Indigenous, people of color), varied body sizes/types, sexual orientations, and gender identities in the Pacific Northwest
- The Gender Spectrum Collection: Free stock photos of trans and non-binary people
- Nappy: Free high-resolution photos of black and brown people
- PICNOI: Free photos of people of color; no attribution required, but can give credit by linking to the site
- #WOCinTechChat: Free photos of women and non-binary people of color working in the Tech field
- Redefining Women Icon Collection: Icons of women
—Instructor Presence
NOTE: This guide is adapted from the book Effective Online Teaching: Foundations and Strategies for Student Success by Tina Stavredes and the QM Teaching Online Certificate required course Creating Presence in Your Online Course.
Regular and substantive interaction (RSI) through online instructor presence
There are five types of interactions that can create instructor presence in your online classroom. Consider what strategies you would implement for each opportunity:
- Encourage learner participation
- Monitor learner progress
- Communicate feedback on learner performance
- Encourage learner knowledge construction and critical thinking
- Encourage learner self-directness
1 - Encourage Learner Participation
- Welcome your learners at the beginning of the course (i.e. when their feelings of isolation and transactional distance are at their greatest)
- Work to develop a rapport with your learners through individual, personalized communications
- Call your learners by name at every opportunity
- Encourage your learners to participate and interact with you
- Post a personal introduction (i.e. express your personality, teaching style, and passion for your subject area) and encourage your learners to do the same
- Share information on both a professional and personal level so your learners identify you as an expert and as an individual
2 - Monitor Learner Progress
- Monitor your learners’ progress and performance on a weekly basis with built-in Moodle features (i.e. Completion Tracking and Reports)
- Intervene with just-in-time communications to help learners overcome any issues
- Provide proactive guidance and opportunities for learners to improve their performance
- Interact on a regular basis with learners who are inactive or fall behind
- Motivate your learners with a phone call or one-on-one Zoom meeting to discuss their progress and troubleshoot any issues
- Follow-up with an email that details the issue(s) discussed and the specific plan/timeline your learners need to action to overcome those challenges
- Ask your learners to confirm that they agree with the plan/timeline and the actions they need to take
3 - Communicate Feedback
- Deliver formative feedback that specifically discusses how your learners can improve their performance (i.e. exactly where to invest additional time and effort)
- Interact with your learners on a weekly basis at the beginning of the course to assess performance and clarify expectations
- Be clear, specific, and positive in your recommendations for improvement to keep your learners motivated and on track with meeting expectations
- Stress strategic and well-placed effort over ability (i.e. growth mindset)
- Encourage learners to assess their own work through Moodle Rubrics and Checklists
- Grade assignments promptly to reduce learners’ anxiety
- Post grades in the Moodle Gradebook so learners can monitor their progress over time
4 - Encourage Knowledge Construction
Use the following strategies to encourage knowledge construction and critical thinking in your online discussion forums:
Prompts
- I have been monitoring the forum and have not seen any posts, so I wanted to give you a little more information to get you started. Consider the following elements as you compose your discussion response this week [list elements]. For example …
- Consider the following scenario [to put the discussion in context] …
- Let me give you a concrete example …
- From my experience, an example to help you understand the concept is …
Elaboration
- You have a great start on the discussion this week. Can you elaborate on your thoughts and ideas and consider the following in your response [list areas where the learner has not responded fully to the discussion question]?
Clarification
- I appreciate your comments about …
- Can you clarify your response, so we can clearly understand your thoughts and ideas?
- Can you provide an illustration or example?
- Can you state this in a different way?
- I appreciate your comment; however, I am unclear how this relates to the discussion question. Can you provide more information to help us see the connection to the topic we are discussing this week?
Weaving
- I really appreciate the multiple perspectives on the issue we are discussing this week. John, Sue, and Nancy believe … while Paul, Jerry, and Carrie believe …
- How do you reconcile the different views? • Is there compelling evidence to support one view over the other?
- Are there other ways of viewing this issue that have not been considered?
- For example, in my experience …
- One aspect of the readings that has not been discussed is … What impact does this have?
Off-Topic Weaving
- I really appreciate the points that have been on the issue including … it appears that some of the points do not relate specifically to this topic such as …, so please be sure that you consider … as you discuss the topic to ensure that all of your comments help us develop a deeper understanding of the topic or issue.
Perspectives
- Consider the following alternative scenario … How would this influence your view of the issue?
- According to … there is another side to this issue. They cite … as evidence for their perspective. How does this information fit with your perspective on the issue? • Is there another way of looking at this perspective from a different lens? What if you were faced with …? What would you do if … occurred? How would you feel if …? From my experience, I have found …
Inferences and Assumptions
- Can you discuss the specific inferences and assumptions you are making from this perspective?
- For this to be true, then … would also have to be true. Have you considered this?
- For this to be true, then you must also believe that …
- What evidence do you have to support the inferences and assumptions you are making?
- What inferences and assumptions does the author make to lead to his/her conclusions?
Implications
- Can you discuss the implications of your line of reasoning on this issue?
- If this is true, how will this influence the present conditions? What will that mean for the future?
- If this is true, what actions must be taken today? In the future?
- What groups will this line of reasoning affect?
5 - Encourage Self-Directedness
Use the appropriate strategies to encourage self-directedness in your learners:
Stage 1: Dependent Learner
- Learners require more frequent feedback to let them know how they are doing and if they are meeting your expectations.
- Feedback should include prompts to help dependent learners become more independent.
- Include processes for overcoming roadblocks as they engage in learning activities, including road maps, checklists, due date documents, outlines, rubrics, and any other resources available to support a dependent learner.
Stage 2: Lack of Confidence and Motivation
- Be encouraging and acknowledge that the learners’ willingness and enthusiasm for learning will help them be successful.
- Help learners build their confidence so that they can accomplish the objectives of the course.
- Help learners expand on explanations and encourage learners to review their work prior to submitting it for grading.
- Encourage learners to ask questions early on instead of struggling with activities and assignments; this can help alleviate frustration and stress from not being sure of the requirements or the activities.
Stage 3: Confident and Motivated
- Help learners expand their thinking by having them explore higher levels of thinking on the subject.
- Help learners apply their understanding in novel ways.
Stage 4: Self-Directed
- • Provide specific feedback on learners’ assignments that points out excellence and why it is excellent.
- • Help learners self-evaluate their performance to enhance critical thinking skills and determine any gaps in learning. From the self-evaluation, they can develop a plan to fill any gaps to continue to build their knowledge and skills.
Tips
- Use Moodle Completion Tracking to track learner progress! All the resources are available via the OLET Knowledge Base: http://kb.dl.clackamas.edu/faculty-main/settingup-completion-tracking-in-a-course/
- Use Moodle Rubrics to encourage self-directed learners! All the resources are available via the OLET Knowledge Base: http://kb.dl.clackamas.edu/faculty-main/usingrubrics-with-assignments/
- Use Zoom to meet one-on-one with your learners! All the resources are available via the Zoom Help Center: https://support.zoom.us/hc/en-us
—Universal Design for Learning
Universal Design for Learning (UDL) is a framework for educational practices that reflects a high value for both diversity and inclusiveness. Review the resources below to learn more about UDL and its practical application in your online course.
RESOURCES
- UDL 3.0 Online Guidelines (PDF)
- UDL 3.0 Online PowerPoint Presentation (gDrive)
- UDL on Campus: Examples (External Link)
AT LEFT: UDL Academy How to Read the UDL Guidelines (YouTube Video)
AT LEFT: Applying UDL with Professor Tom Tobin (YouTube Video)
Make Your Course Accessible
Why should I care about accessibility?
- Makes your course more equitable by reducing barriers and making learning available, usable, and meaningful for all learners, especially for our students with disabilities
- Communicates that we expect, welcome, and are proactive and prepared for all learners
- Complies with Sections 504 and 508 of the Americans with Disabilities Act and the ADA Accessibility Rules for Web Content & Mobile Apps
- Reduces cognitive load for learners, freeing up more brain space to engage with their learning
- Ensures that everyone, including the hearing-impaired, can access videos, Zoom meetings and classes, and any recording
—Who is responsible for accessibility?
Accessibility is everyone’s responsibility! Read below how the Disability Resource Center (DRC), Faculty, and Online Learning & Educational Technology (OLET) partner to support our students.
![]()
Disability Resource Center (DRC)
- Determine appropriate student accommodations based on documented diagnoses and symptoms
- Notify faculty (via email) when an accommodation is required
- Assist students and faculty efforts to ensure accommodations are met
- Supply students with required textbooks in an accessible format
Please contact the DRC directly if you have any questions at drc@clackamas.edu.
Faculty and Subject Matter Experts (SME)
- Make all your documents and online content screen reader-friendly with built-in styles and formatting for headings, lists, columns (instead of tables), paragraph styles, etc.
- Include image descriptions
- Write descriptive links, not navigational, e.g. Clackamas Community College Website, NOT click here.
- Include only media that has closed captioning or a transcript available
- Review your course with the YuJa Panorama Accessibility Report
NOTE: Documents and online content include required eTextbooks and online readings. If your students access these through CCC Library, visit their eResource and Digital Textbook Accessibility page for support.
Please contact OLET directly if you have any questions at online@clackamas.edu.
Online Learning & Educational Technology (OLET)
- Promote OSCQR (Open SUNY Course Quality Review) accessibility standards
- Promote OCCDLA (Oregon Community College Distance Learning Association) instruction and inclusive design initiatives
- Assist faculty with accessibility tools in Moodle, such as YuJa Panorama
- Supply extensive faculty support resources to meet DRC accommodations, see OLET Knowledge Base Accessibility
- Provide Zoom and Kaltura captioning support for faculty
- Assist faculty in developing an accessibility plan when barriers are encountered
Please contact OLET directly if you have any questions online@clackamas.edu.
—What can I do to make my course more accessible?
 HERE ARE 5 THINGS TO DO RIGHT AWAY
- Make all your documents and online content screen reader-friendly with built-in styles and formatting for headings, lists, columns (instead of tables), paragraph styles, etc.
- Microsoft Word w/Accessibility Checker, PowerPoint, and Excel
NOTE: Create an accessible PDF directly from your Word, PowerPoint, or Excel document to add accessibility tags and to maintain the accessibility of the original file. - Google Docs, Slides, and Sheets
- Moodle/web-based apps TEXT/HTML editor in Moodle/web-based apps
- Microsoft Word w/Accessibility Checker, PowerPoint, and Excel
- Include image descriptions
- Write descriptive links, not navigational, e.g. Clackamas Community College Website, NOT click here.
- Include only media that has closed captioning or a transcript available
- Evaluating course materials
- Using closed captioning in Zoom during all live, real-time sessions
- Request machine captioning only for French, German, Russian, Spanish, or Vietnamese videos; otherwise, Kaltura (My Media) videos are automatically machine-captioned
- Request human captioning only when a DRC accommodation requires 100% accuracy
- Review your course with the YuJa Panorama Accessibility Report
NOTE: More information is available via the FREE University of California Berkeley Accessibility Basics for bCourses (not Moodle).
—Accessibility Tools
- YuJa Panorama—which is already integrated into your Moodle course—helps check and improve the accessibility of course materials and resources. Panorama can also generate alternative formats of documents for you and students. For more information, visit the OLET Knowledge Base article on Panorama.
- The TinyMCE Text Editor has many tools to assist in entering content into your course. Many of these icons and functions should be familiar to anyone who uses a word processor. Additionally, it includes tools to help make your content more accessible. For more information, visit the Using the TinyMCE Text/HTML Editor article.
-
Kaltura will automatically machine caption videos in English when recorded by or moved into My Media. However, if the spoken language is French, German, Russian, Spanish, or Vietnamese, you will need to request machine captioning in that specific language. Machine captioning is fast, simple, and decently accurate (75-85%) but may struggle with acronyms and industry-specific words. However, you can edit the machine captions. If an accommodation from the Disability Resource Center (DRC) requires 100% accuracy, you can request human captioning. For more information, visit the OLET Knowledge Base article on Adding Closed-Captions (CC).
—Yuja Panorama
Yuja Panorama, which is already integrated into your Moodle course, helps check and improve the accessibility of course materials and resources. The tool can also generate alternative formats for you and your students.
What happened to Anthology Ally? The Oregon Community College Distance Learning Association (OCCDLA) chose to change to Panorama after a great deal of testing and evaluation. The tool offers more features and innovative support to improve accessibility in your course(s).
Panorama provides accessible content to help every learner succeed. The integrated tool provides students with easy access to a plethora of alternative formats to choose from and provides instructors with scorecards and badges to help ensure content is as accessible as possible. Here are just some of its resources:
- Alternative Formats
- Accessibility Report
- Course Report
- Scanned PDFs
For more information, visit the OLET Knowledge Base article on Panorama.
—TinyMCE Text Editor
The text editor has many tools to assist in entering content into your course. Many of these icons and functions should be familiar to anyone who uses a word processor. You will see the text editor when describing an activity, posting to a forum, writing an answer to a quiz question, adding feedback while grading, or editing the content.
The fourth set of buttons in the TinyMCE text editor are tools to help make both your content and your experience creating that content with the TinyMCE Text Editor more accessible.
- Accessibility Report (Gauge icon)
- Clear Formatting
- Paste as text
- Toggle Full-Screen
- View as HTML/Source code
For more information, visit the Using the TinyMCE Text/HTML Editor article.
—Closed Captioning
Kaltura will automatically machine caption videos in English when recorded by or moved into My Media. However, if the spoken language is French, German, Russian, Spanish, or Vietnamese, you will need to request machine captioning in that specific language.
Machine captioning is fast, simple, and decently accurate (75-85%) but may struggle with acronyms and industry-specific words. However, you can edit the machine captions. If an accommodation from the Disability Resource Center (DRC) requires 100% accuracy, you can request human captioning.
- Request Machine Captioning
- Request Human Captioning
For more information, visit the OLET Knowledge Base article on Adding Closed-Captions (CC).
NOTE: In order for OLET to request human captioning, the video must be able to be uploaded to Kaltura.
—HTMLg Source Editor
![]() Do you have a document or other test that is not working the way you want? Are you in the habit of copying and pasting text? HTMLg can:
Do you have a document or other test that is not working the way you want? Are you in the habit of copying and pasting text? HTMLg can:
- Copy content cleanly
- Remove old formatting
- Repair broken HTML and other codes
HTMLg Instructions
- Open up your source document for editing
- Highlight and Copy your content.
- Open up the HTMLg Editor in a new tab or window
- Paste the copied content into the (left) visual column of HTMLg
- Click the Clean button in the bottom-right corner of the page
- Highlight and Copy your cleaned content from the (left) visual column of HTMLg
- Return to your document
- Paste the cleaned content over the old (or into a new document) and save your changes.
NOTE: You can also fine-tune what is cleaned up from the advanced options at the bottom of the page.
HTMLg Editor helps instructors fulfill the following best practices for online learning:
- Any technology tools meet accessibility standards.—OSCQR Standard 15
- Text is formatted with titles, headings, and other styles to enhance readability and improve the structure of the document.—OSCQR Standard 21
- Flashing and blinking text are avoided—OSCQR Standard 22
- A sans-serif font with a standard size of at least 12 pt is used.—OSCQR Standard 23
- Text content is available in an easily accessed format, preferably HTML. All text content is readable by assistive technology, including a PDF or any text contained in an image.—OSCQR Standard 34
- Text, graphics, and images are understandable when viewed without color. Text should be used as a primary method for delivering information.—OSCQR Standard 36
—Moodle Accessibility Statements
Clackamas Community College is committed to making all course materials as accessible as possible to all students. Additionally, our proactive course design and development reflects our commitment to accessibility and usability for all online students.
Moodle follows established best practices to ensure that all its courses are accessible for all users, regardless of disability.
You can read the accessibility statements here:
- Moodle Accessibility Statement
- Microsoft Accessibility Statement
- Google Accessibility Statement
- Mozilla Firefox Accessibility Statement
- Zoom Accessibility Statement
- WordPress Accessibility Statement
—CCC Library eResource Accessibility Statements
- CCC Library is committed to providing eResources accessible to everyone in our campus community. eResources include articles, eBooks and eTextbooks, streaming videos, and all other online content accessible through CCC Library databases.
- For up-to-date information on Library-provided eResource accessibility, please see CCC Library’s eResource and Digital Textbook Accessibility page.
Zoom Video Conferencing
 Zoom is a synchronous online collaboration tool that can be used to conduct and record online lectures, host office hours, set up group meeting spaces, and more—all with annotation and whiteboard capabilities.
Zoom Essentials
- →→Account Setup (PDF)
- Basic Use (PDF)
- Best Practices (PDF)
- Recording Content (PDF)
- Required Security Settings for Zoom
- How to Link Zoom to Your Outlook Calendar
- How to Enable/Disable Sound Notifications
- Live Automatic Transcription (PDF)
Teaching Resources
Zoom Resources
- Zoom Support
- NEW! Zoom AI Companion Support
- NEW! How to Enable and Customize the Waiting Room
- Zoom Learning Center
- How to use Zoom on a Chromebook NOTE: A Chromebook does not have the Annotate option on shared screens.
- Zoom Meetings and webinars comparison NOTE: CCC has limited Webinar capability available upon request.
- Zoom Virtual Backgrounds - Generic
Explore Zoom
See Zoom in action by enrolling yourself in our Zoom with Moodle course.
—How to Access Zoom Cloud Recordings in Kaltura
There are two ways to access your Zoom Cloud Recordings in Kaltura:
MediaSpace
- Go to video.clackamas.edu
- Click Login
- Select My Media from the drop-down menu
Moodle
- Go to online.clackamas.edu
- Click on Log in
- Click on My Media in the red bar
NOTE: All content added to Kaltura via Moodle will also appear in MediaSpace.
—Zoom Cloud-Recordings Retention Plan
Zoom Video Cloud Recording will be stored in the Zoom Cloud for up to 90-days with permanent
copies of the original videos automatically uploaded to Kaltura. These videos are available through MediaSpace or the My Media area of Moodle.
- Edited Videos: Zoom will automatically upload the original cloud recording to Kaltura, but if you edit your Zoom cloud recording you will need to manually download the edited video and upload to Kaltura if you wish to save those changes beyond the 90 days. However, the best choice is to edit your videos in Kaltura.
- Permanently-Deleted Videos: We do not have a method to restore a permanently-deleted video so it is important that you verify (see instructions below) any video you wish to have beyond the 90-day retention plan is uploaded to Kaltura prior to the 90 days.
How-To Zoom Management
—How to Enable/Disable Sound Notifications
Enabling Sound notification allows the host to play sound when someone joins or leaves a scheduled meeting with video turned on. If the sound notification is disabled, no sound will be played when someone joins or leaves the meeting.
- Sign in to clackamas.zoom.us
- Click on Settings from the PERSONAL menu to the left.
- Scroll down to Sound notification when someone joins or leaves under In Meeting (Basic).
- Toggle the setting on or off depending on your preference.
Enable: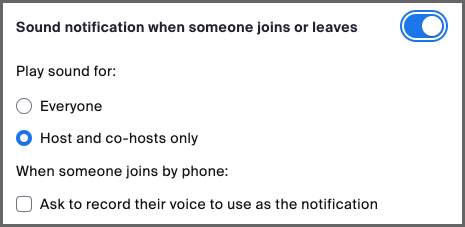
Disable:
—Required Security Settings for Zoom Meetings
Zoom now requires all meetings to be secured with one of the following security options:
- A Passcode
- Waiting Room
- Only authenticated users can join meetings
If you need help selecting and setting up the best security option for your meetings, please view this article Zoom Meeting Security Options that discusses each of these options.